How to Resize EC2 Instance for Performance and Savings

At its core, resizing an Amazon EC2 instance involves a simple stop-modify-start process through the AWS Console or CLI. This action allows you to scale your server's CPU and memory resources up or down, effectively aligning performance with workload demands while keeping costs in check. Mastering this technique, often called 'rightsizing,' is a critical skill for efficient cloud management and a cornerstone of any effective cost optimization strategy.
Contents
Ready to Slash Your AWS Costs?
Stop paying for idle resources. Server Scheduler automatically turns off your non-production servers when you're not using them.
Ready to stop overspending on idle servers? Automate your EC2 resizing and scheduling with Server Scheduler to cut your AWS bill by up to 70%.
Why Resizing Your EC2 Instance Is a Smart Move
Knowing how to resize an EC2 instance is more than a technical task; it's a fundamental strategy for intelligent cloud governance. The need to change an instance type arises frequently in dynamic environments. For example, a web application might struggle under unexpected traffic spikes, leading to slow load times and a poor user experience. Conversely, a development server could be wildly over-provisioned, sitting idle for most of the day while incurring unnecessary costs. Resizing transforms this scenario from a simple technical fix into a powerful tool for balancing application performance, user satisfaction, and your AWS budget. When executed with proper preparation, it is a low-risk operation that paves the way for a more efficient and scalable infrastructure, allowing you to optimize cloud performance and efficiency and make strategic, data-driven decisions.
 cloud cost optimization strategy, enabling your infrastructure to grow or shrink in lockstep with business needs. The goal is to find the sweet spot between an oversized, wasteful instance and an undersized one that frustrates users.
Your Pre-Resize Safety Checklist
Before initiating a resize, establishing a safety net is crucial. Rushing into the process without a thorough pre-flight check is a common mistake that can lead to avoidable downtime, data integrity issues, or compatibility headaches. A few minutes dedicated to preparation can save hours of troubleshooting later. The single most important step is creating a fresh backup, which serves as a complete point-in-time recovery point should anything go wrong. You have two excellent options: creating an Amazon Machine Image (AMI) or taking a snapshot of the attached Elastic Block Store (EBS) volumes. An AMI is a full template of your instance, bundling the root volume, launch permissions, and block device mappings, making it ideal for launching an exact duplicate quickly. An EBS snapshot is a more granular backup of a single volume but is equally effective for data protection.
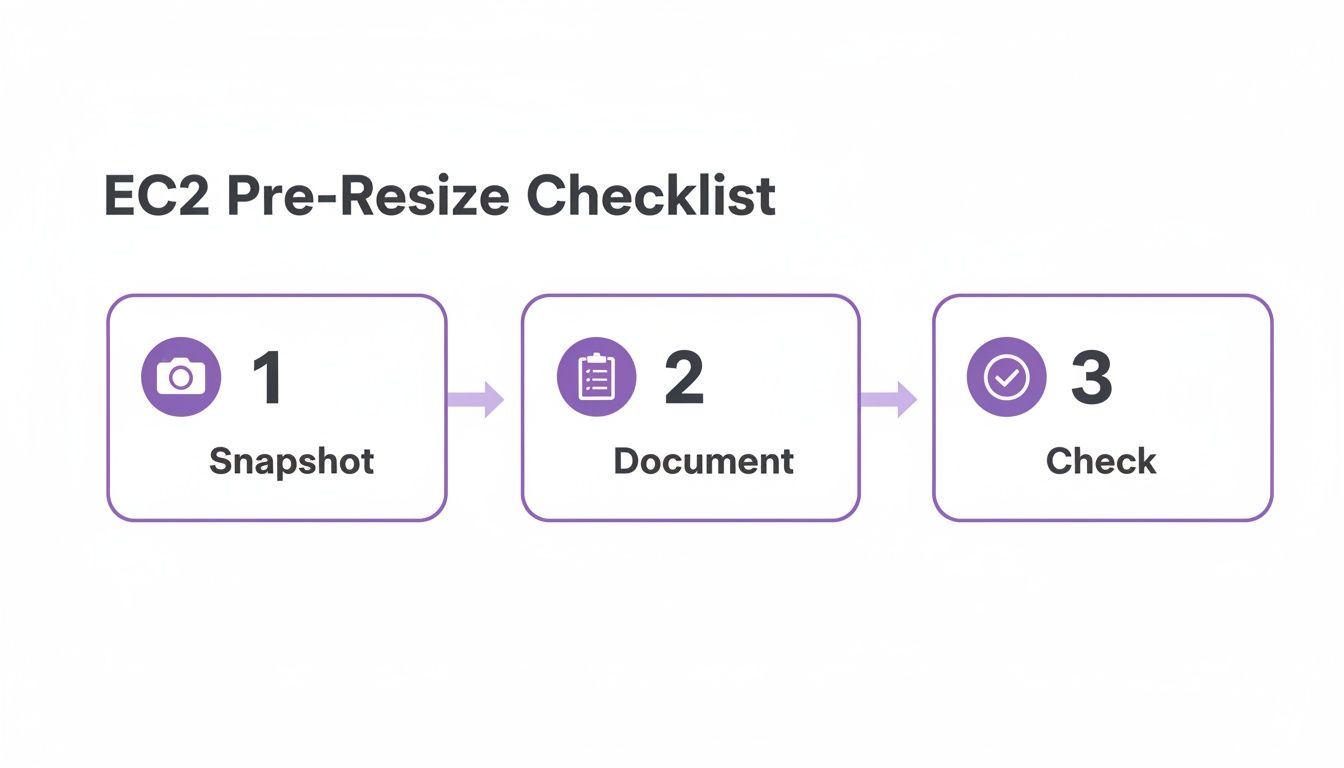
Next, document your current instance configuration. Note key details such as private and public IP addresses, EBS volume attachment points (e.g., /dev/sdf), and all associated security groups and IAM roles. This information is invaluable for reconnecting everything post-resize or for rolling back if necessary. Finally, you must verify compatibility between the current and target instance types. A common issue is moving to a modern instance family without ensuring the operating system has the required Elastic Network Adapter (ENA) driver, which would result in a network connectivity failure.
Important: A common "gotcha" is moving from an older instance family to a modern one without checking for Enhanced Networking support. Many newer instance types absolutely require the Elastic Network Adapter (ENA) driver. If your OS doesn't have it, the instance will boot up but won't be able to connect to the network.
This table highlights key compatibility factors to check:
| Compatibility Factor | What to Check | Why It Matters |
|---|---|---|
| Virtualization Type | Confirm if your current instance uses HVM or PV. | Most modern instances are HVM only. Moving from PV to HVM requires extra steps. |
| Architecture | Ensure both old and new types are x86 or ARM. | You can't just switch processor architectures with a simple resize. |
| ENA Support | Check if the target instance requires ENA. | Lack of the ENA driver will cause network connectivity failure on newer instances. |
| Nitro System | Verify if the target is a Nitro-based instance. | Nitro instances have specific requirements for EBS and network drivers. |
By methodically working through this checklist—backup, document, and verify—you transform a potentially risky action into a controlled and predictable operation. For more on backups, see our guide on backing up Linux systems.
Resizing an EC2 Instance with the AWS Console
For users who prefer a graphical interface, resizing an instance through the AWS Management Console offers the most straightforward path. This visual workflow is intuitive even for those not deeply immersed in AWS daily. The entire process begins in the EC2 Dashboard, where you locate and select the instance you intend to resize. A critical prerequisite is that the instance must be in a stopped state before you can modify its type. Attempting to change a running instance will result in an error, as AWS cannot alter the underlying hardware while the virtual machine is active. A clean shutdown is non-negotiable to ensure data integrity and prevent file system corruption.
Once the instance status shows "stopped," the modification options become available. Navigate to Actions > Instance Settings > Change instance type. This opens a dialog window with a dropdown list of all instance types compatible with your server's current configuration, such as its architecture (e.g., x86_64) and virtualization type (HVM). This selection is not merely about choosing a larger or smaller size; it's about selecting a new hardware profile with a specific combination of vCPUs, memory, and network performance. Your performance data should guide this decision. If CPU utilization is consistently high, a compute-optimized (C-family) instance is a logical choice. If memory is the bottleneck, a memory-optimized (R-family) instance would be more appropriate. After selecting the new instance type and clicking "Apply," you must restart the instance by navigating to Actions > Instance State > Start instance. The instance will then boot on new hardware, a process that typically takes a few minutes. The final step is verification: confirm the new type in the console and connect to the instance to ensure the OS and applications are running correctly.
Automating the Resize with the AWS CLI
While the AWS Console is effective for individual changes, the AWS Command Line Interface (CLI) is the preferred tool for developers and system administrators managing infrastructure at scale. The CLI enables you to transform the manual, multi-click resize process into a fast, repeatable script that can be integrated directly into deployment pipelines or maintenance routines for hands-off automation. The core of this process relies on a sequence of three commands: aws ec2 stop-instances, aws ec2 modify-instance-attribute, and aws ec2 start-instances. This trio forms the backbone of any automated resizing script. For those seeking automation without the overhead of script maintenance, you can also schedule EC2 instance resizes with Server Scheduler.
The process begins by stopping the target instance. For example: aws ec2 stop-instances --instance-ids i-0123456789abcdef0. Once the instance is offline, you can modify its type. To change the instance to a t3.large, the command would be: aws ec2 modify-instance-attribute --instance-id i-0123456789abcdef0 --instance-type "{\"Value\": \"t3.large\"}". Finally, bring the instance back online with its new specifications: aws ec2 start-instances --instance-ids i-0123456789abcdef0. The real power emerges when these commands are embedded within a shell script that includes validation and error handling, such as wait commands to confirm the instance state before proceeding. This scripted approach is a game-changer for predictable maintenance and scaling operations. You can learn more from the official AWS guidelines on instance resizing or explore other workflow automation tools for productivity to streamline your operations.
Post-Resize Verification and Troubleshooting
Successfully resizing an EC2 instance doesn't end when it starts back up. The critical post-resize phase is where you confirm that the technical change has translated into an operational success. Your first stop should be the AWS Console's EC2 Dashboard to verify that the "Instance type" field reflects the new size you selected. This simple sanity check confirms AWS processed the request correctly. After this confirmation, connect to the instance via SSH or RDP to ensure the operating system booted cleanly and that your applications are functioning as expected. Check system logs for any boot-time errors and verify that key services are running and responsive.
 guide to rebooting an EC2 instance. For those who prefer hands-off management, you can see how Server Scheduler can automate the whole process.
Making Data-Driven Resizing Decisions
The true art of resizing an EC2 instance lies not in the action itself, but in knowing which instance type to choose and why. Moving beyond guesswork requires a data-driven approach, transforming resizing from a reactive fix into a proactive optimization strategy. AWS CloudWatch is an indispensable tool for this, providing the raw metrics needed to make intelligent, cost-effective decisions. Analyze key metrics like CPU Utilization, Network In/Out, and Memory Usage over a period of at least a few weeks to understand the instance's typical workload cycles. This process, known as rightsizing, is a core pillar of modern cloud financial management and FinOps best practices.
The goal is to match your workload to the right instance family. If CPU utilization is consistently high while memory usage is low, migrating from a general-purpose (M or T family) instance to a compute-optimized (C family) one is logical. Conversely, an application constantly constrained by RAM would benefit from a memory-optimized (R family) instance. According to industry analysis and EC2 rightsizing best practices, a significant portion of EC2 instances are overprovisioned. A general guideline is that if an instance's average CPU utilization remains below 20%, it is a strong candidate for downsizing.
| Instance Family | Primary Resource | Ideal Workload Example |
|---|---|---|
| General Purpose (T, M) | Balanced CPU/Memory | Web servers, small databases |
| Compute Optimized (C) | High CPU | Batch processing, media encoding |
| Memory Optimized (R, X) | High Memory | In-memory databases, real-time analytics |
By letting performance data guide your choices, you ensure every resize is a meaningful step toward a more efficient and cost-effective infrastructure.
Common Questions About Resizing EC2 Instances
When preparing to resize an EC2 instance, several common questions frequently arise. Addressing these beforehand can prevent simple mistakes and build confidence in the process. A primary concern is downtime. While an instance must be stopped to be resized, the actual offline period—encompassing the stop, modify, and start cycle—is typically very short, often less than five minutes. It is not possible to resize a running instance; AWS enforces this requirement because the operation may involve migrating the instance to new physical hardware. Another frequent question concerns IP addresses. A standard public IPv4 address is released upon stopping and a new one is assigned upon restart. However, an Elastic IP address will persist through the resize process, and private IPv4 and IPv6 addresses are always retained.
Heads up: Instance store is temporary. Stopping the instance erases everything on it. Always back up your data to EBS or S3 before you start the resizing process.
A critical consideration is data on instance store volumes. This storage is ephemeral, meaning it is tied to the physical host machine. Consequently, any data on an instance store volume is permanently lost when the instance is stopped. It is imperative to back up all essential data from these volumes to a persistent storage solution like an EBS volume or an Amazon S3 bucket before initiating the resize. Keeping these key points in mind will help ensure a smooth and successful resizing operation.
Tired of doing this manually? Server Scheduler lets you set up automated resizing windows with a simple point-and-click interface—no scripts, no hassle. Start scheduling your EC2 resizes today.